We Completely Misunderstood Multi-sensory Instruction...

We have a confession to make.
When we started our Reading Intervention journey, we totally misunderstood what multisensory instruction meant.
We were pretty sure that we needed to be engaging all the senses. We had the sand trays and the shaving cream. We had our students forming letters out of Play-Doh.
We thought that we were crushing the multisensory thing.
And….we were wrong.
We want to let you in on the secret that changed our lives as interventionists. Multisensory instruction IS a critical piece of a lesson, but it doesn’t have to be as extensive and over-the-top (and messy, quite frankly) as we all thought.
Multisensory instruction is as simple as having your student write a letter while saying its name and sound.
Research supports multisensory instruction in the sense that you are engaging the student’s visual sense (seeing the letter they are writing), auditory sense (hearing the sound they are saying), and kinesthetic sense (writing the letter). So, if you were working on the “ck” phonogram, the student should write “c-k” while saying “C-K says /k/”.
What does structured multisensory teaching look like?
We’re so glad you asked because we wanted to provide a resource that would help you utilize multisensory instruction in a systematic framework.
This set of cards can be used in a ton of different ways but we recommend the following:
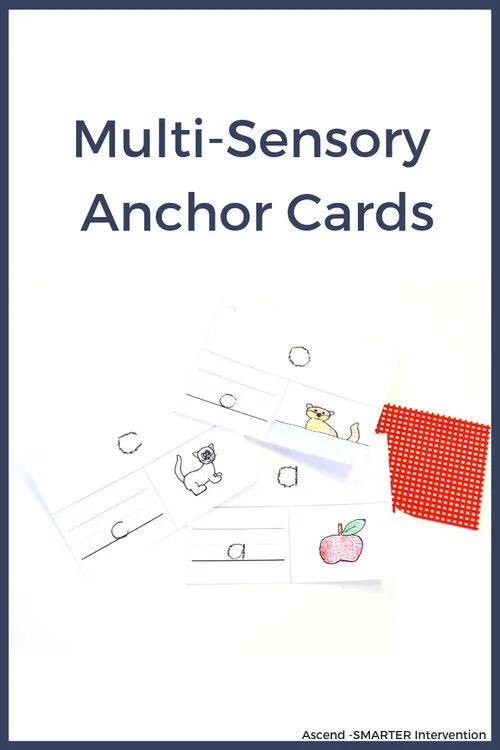
1. Trace the letter
While tracing the letter you may want to consider using a tactile grid behind the word and tracing in crayon to provide a tactile experience. Once the letter is traced you can have the student use their fingers to trace the letter while saying the letter name and sound out loud (if this is confusing, because things get confusing when written out - check out the video below).
2. Use the dotted lines to write the letter
On the next line have the student write the letter or letter group while stating the sound.
3. Use the open box to support kinesthetic or visual learning
You can have the student draw a picture of a keyword with the sound or if you want to get creative to get that added engagement you could consider having the students use Play-Doh or wiki sticks/pipe cleaners to make the letter. This can really be used in whatever way you like to help your students retain the letter sounds.
>>>Click here to grab our Multisensory Phonogram Introduction Cards<<<
Multisensory instruction does NOT have to be messy! It does NOT need to be a struggle!
For more information about structured literacy intervention and what the research actually supports, grab our Science of Reading Blueprint. This blueprint will help you understand the 3 key scientific models that drive effective literacy instruction, learn how to integrate the research into practice, and provide simple checklists that will help you weave the science of reading into your instruction.
Then, check out our video tutorial to see an example of multisensory instruction in action!